Here is a comical tale of food blogging. LT eats nothing. Literally. He is on what many affectionally call the “white diet.” White bread, white rice, French fries, pizza, spaghetti with pasta sauce (miraculously), cereal, yogurt, chips, goldfish, and chicken tenders. Notice there are no fruits and vegetables on his I-will-eat-these-items-only list. You can imagine what meal planning can be like. As a general rule, we have spaghetti one night, and pizza one night. The other five nights, unless we are out to eat, it’s cereal or PBJ for him. If you ask him what his favorite thing to eat is he will say, “French fries and chicken.” (And by chicken, he means fried chicken tenders.) I don’t make French fries and chicken. One, that’s Chef’s job when we dine at Tersiguel’s, and two, I don’t enjoy frying at home. It’s messy, and everything, I mean everything, smells like fryer oil, so I prefer to leave it to the pros.
I kinda got a bug the other day knowing I had chicken tenderloins in our freezer. I thought what if I baked them? I can’t say I was doing it to be healthier, I was just looking for alternatives to frying it. And in my over active imagination, both L&L liked it, and asked when we could have again, and I blogged all about this great, time saving family recipe that everyone would like. THE. JOKE. WAS. ON. ME. FRIENDS. The good news, they really were good. Even Chef said so, so I gotta go with this because maybe your little ones are on the white diet, or maybe your favorite food is chicken tenders and French fries, and this is an easy preparation. Whatever it maybe, I am sharing this.
I am just going to say it up front – this whole recipe, the process of making it, the photos, and my kids lack luster reaction, made for a comical afternoon for me.
Up first, I grabbed four shallow soup bowls for dredging the chicken. It started out like this:
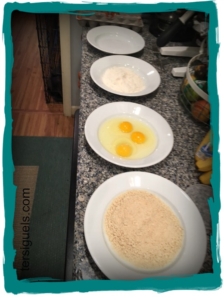
I am holding the camera, getting a quick shot of the set-up, and I am thinking, “Huh. Who is really gonna try a recipe that is already taking up this about of space?” (I was already feeling defeated, and yet no dinner had been prepared.)
I grabbed a glass bowl and the package of chicken, and it was when I opened it, I realized I did not have chicken tenderloins, I had chicken breasts in the freezer. I will say this, I could have easily just breaded them and thru them in the oven, but this was for the kids. (Laugh it up, because I was and am.) I put the glass bowl back, and grabbed a cutting board instead. I started by butterflying the chicken breasts.
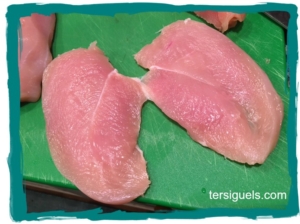
The easiest way to do this is to press firmly on the breast with your non-cutting hand, and gently guide the knife back and forth thru the breast until it’s in two. I left this piece together at the end, so you can see why it’s called butterflying. I cut each halved breast into three to four pieces.
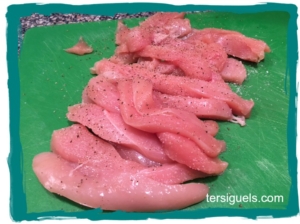
This is three chicken breasts – a lot more yield than I was expecting, but I was thinking, “Great. L&L will love it and I can test leftovers, too.” (Keeping laughing.) I liberally salted and peppered the tenders right on the board. Then I grabbed the glass bowl. In went the chicken, in went the milk.
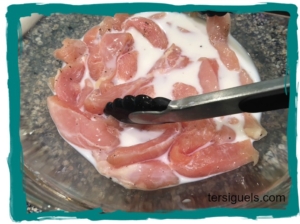
Ideally I would have preferred buttermilk, but I didn’t have any, and at the rate in which this recipe was being created and executed, I said forget it. Regular milk is a-ok. I am not sure if I have written this yet, but if I have, it must be important for me to keep saying, and if I haven’t, well, there is a first for everything. These recipes that I share, I can only hope that they inspire you to try something new, or simply gather ideas for your kitchen. I don’t see recipes as being rigid, I see them as I guide. So, if you have zero reason to buy buttermilk other than this recipe, don’t do it. Milk is just fine. Or almond milk, coconut milk, soy milk. I won’t be showing up to ask how you did it. Enough about that, we have some chicken to dredge.
After the chicken sat in the milk for a few minutes, I looked at the amount of chicken I had vs the original bowl of flour I set up and knew that wasn’t going to work. I turned to my trusty zip top bag to get the job done. In a gallon bag, I added the drained chicken, and flour. Sealed it. Shook it like it was my day job. The idea is to coat all the chicken in flour. Pretty easy. I felt like I was going in the right direction.
I set the chicken aside for a minute. Before diving into the messy dip in egg, dip in panko, I wanted to make sure I didn’t have to do anything once I got started. I was stopping for no man or little boy needing help with homework.
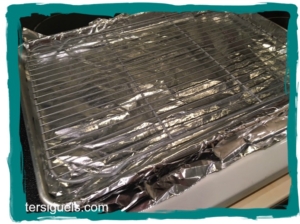
I prepared my baking sheet, by lining it with tin foil, and topping it with a baker’s cooling rack. Then I sprayed the rack with non-stick spray. (This is also the easiest, least messy way to cook bacon. MMMmmm, bacon.) For clean up, I put the rack in the dishwasher, and throw the foil in the trash. It’s a tough job, but someone has to do it.
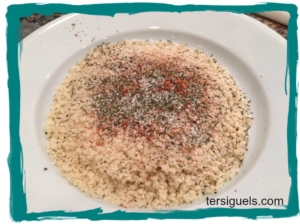
I also took the time to season my panko bread crumbs. Again, for the kids. I kept the flavor simple. Some salt, pepper, paprika, and Italian seasoning.
Here is the thing. The next step, I have no pictures because, as previously stated, I was stopping for no man.
The process: In one bowl three eggs cracked, and quickly whipped, and salt and pepper added. A handful of chicken from the flour bag goes into the eggs, coat each piece, and add to the panko, coat again. And you keep this process up until you realize even if they do like it we are gonna be eating chicken for days, and you have finally coated all the pieces.
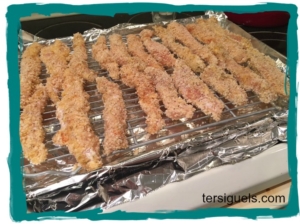
Throw them in the oven. Set the timer for twenty minutes. Wash hands. Check first grade homework. Or pour a glass of wine. I should have poured the wine. Oh well.
I had this thought once I got the chicken in the oven that they may not like it. At this point, I really didn’t care because I knew I was eating it. I thought what could I make on-the-fly that would warrant little prep, and no whining. Oh, right, risotto. I can only hope the mascara wearing readers have a tissue nearby because the tears from all the laughing you have done to this point have just burst thru the dam. The risotto will have to wait until tomorrow for a post, but there is nothing on-the-fly about it, and as soon as the timer went off, I couldn’t wait to show L&L.
This is how it went down.
Me, “Boys I made chicken tenders, and special rice (aka risotto).”
LT, “I don’t want chicken or special rice. I want the Finding Dory mac and cheese.”
L2, “Me too.”
Now, you can weep with me.
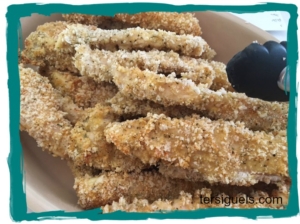
I can’t even say these are kid tested, but they are definitely mother approved. And I will be making them again, soon.
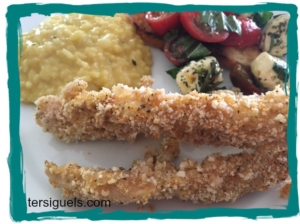
Baked Chicken Tenders
1.5 lbs chicken tenderloins, or chicken breasts cut into strips
1 c milk
1 c flour
3 eggs, whipped
2 c panko bread crumbs
1 – 2 tsp paprika
1 T Italian seasoning
salt
pepper
Preheat oven to 425 degrees. Line a baking sheet with tin foil, top with a baker’s cooking rack, and spray with nonstick spray.
In a large bowl, add the chicken, and milk, salt and pepper. Let stand for a three minutes. In a zip top gallon sized bag, add the flour and drained chicken. Close the bag, and shake to coat the chicken.
In a shallow dish, crack and whip three eggs, add salt and pepper. In a second shallow dish, add the panko, paprika, Italian seasoning, and salt and pepper.
Dredge the flour coated chicken in the egg, and then the panko. Continue this process until all the pieces are coated.
Put the baking sheet of chicken in oven, and turn the heat back to 400 degrees. Bake for twenty minutes.

One thought on “Baked Chicken Tenders”
Comments are closed.