Summer Meal Planning I

A few weeks ago I gleefully announced spring’s arrival.  Mother Nature had other plans.  After being excited about weather above 50 degrees, MN was really hoping that Central Maryland would build an ark because it nearly rained for 40 days and 40 nights.  And just as the rain stopped, spring is coming to an end and it’s looking like August heat in our future forecast.  The weather is such a phenomenon, and sometimes an anomaly, to me.

The thing is, while we all sat around inside for the last four weekends drafting our ark plans, something happened – time passed us by.  This weekend is Memorial Day.  We all call it the unofficial start to summer.  Our local pools are open, the school year is winding down, and yes, friends, summer is coming.  (Not be confused with #winteriscoming.)  I hope summer is coming.  The last time I was excited about a season arriving it didn’t go as I had hoped.

MN, I’ve gotta move on from the rain.  We all have to move on from the rain.  And MN, I know I have been tough on you this spring, but I am not saying I am routing for a drought either.  Just to be clear.  It’s true, MN, I want it all.

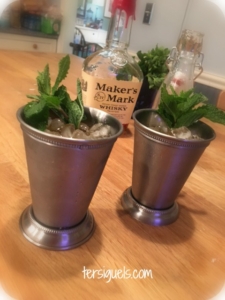
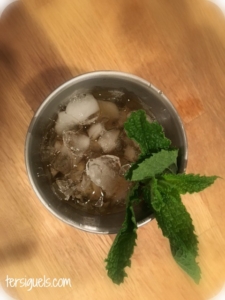
Now that I have done my MN mea culpa, let’s just get back to the fact that MEMORIAL DAY is in less than a week.  With that said, I am already thinking of our long days by the pool.  Oh, I long for this time of year.  Early morning chores, lead to long days in the sun, swimming, playing Sharks and Minos, and snowballs.  It also means packing a cooler.  Man cannot live on snowballs alone.

I have a few tricks up my sleeves.  This post is the bottom building block, so let’s get to it.

If you are Pinterest user, you know all about freezer meals.  I truly believe freezer proteins have their place, and in our house, it’s summer time.  I know, that sounds a bit silly, but stick with me, you will see why.

Today, I went to one of my favorite places, Trueth’s.  For you dear readers that don’t live in Central Maryland, it’s our local butcher shop.  This is what I picked up today:

trueths-haul-tersiguels
Yes, I will give it to you, it looks like I was in a candy shop.  I was, kinda.  This picture is a summer of poolside meals just awaiting to happen.  In the pile is 2 lbs of lump crab meat, 2 lbs of beef cubes, a ham steak, 8.8 lbs pork shoulder, divided, 5 lbs of ground beef, 5 lbs of bacon, 1 lb ground pork, and 5 lbs of shrimp, 24 chicken wings, and 5 whole chicken breasts.

Right into the freezer went the crab meat, the ham steak, the beef cubes.  Next week, crab soup.  In the fridge, the pork to thaw for homemade pork sausage for pizza.

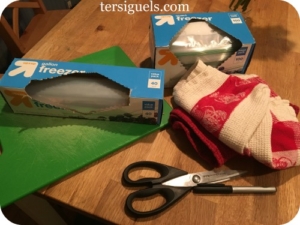
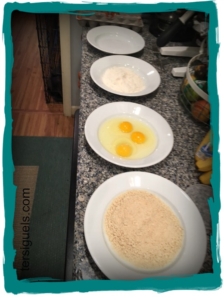
To breakdown what you see above, some additional supplies will be needed.  Zip-top bags, freezer paper, permanent marker, cutting boards, scissors, sharp knife, and several hand towels or paper towels.  Oh, and lots of soap because it’s about to get messy.

bulk-summer-freeze-supplies-tersiguels

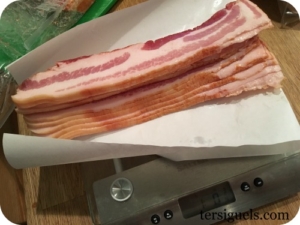
If you have a kitchen scale, this a great time to bust that out too. (If you don’t, you have two options.  One eye ball stuff, or speak with your butcher about how your items are packaged.)

scale-plus-bowl-tersiguels
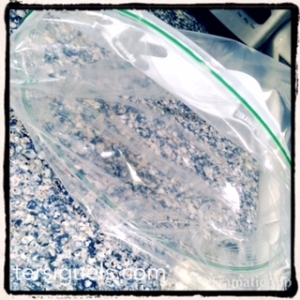
First up – it’s really important when repackaging items for the freezer that it’s labeled.  All it needs is the date and contents.  There is nothing worse than pulling out chicken breast when you are planning for chicken tenderloins.  It’s also important to know how long something has been in your freezer.  I following a six month timeline.  If I am approaching six months in the freezer, it’s getting moved the top of my prep list. The meals I am building today will be gone before school starts in the fall.  Let’s get started.

zip-tips-labeled-tersiguels zip-tops-flipped-tersiguels

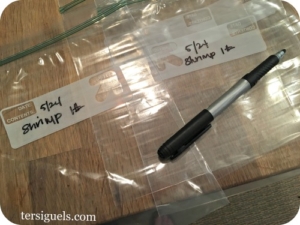
The picture on the left, follows my label note.  The one on the right, has the tops of the bags flipped out and down.  By doing this ahead, I don’t have to stop to open bags, and it keeps the exterior of the bag, and the zip top clean.  The health safety part of Chef in my brain is starting to come out.  You will notice, I am handling a lot of raw food.  It’s important to execute this in a timely manner to get everything back in the fridge or freezer, and not contaminate anything.  A little planning ahead guarantees you can be successful at this.

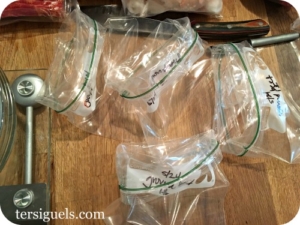
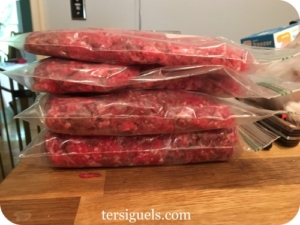
I started by dividing the shrimp into five one pound bags.  Moving onto the ground beef.  I divided them into three one pound bags, and one two pound bag.  It looks like this:

gb-packaged-tersiguels
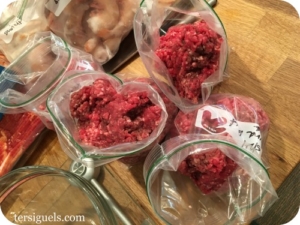
I wait until each bag is full, wash my hands, and then zip them all closed.  Flattening them makes it much easier to store.

gb-ready-to-go-tersiguels
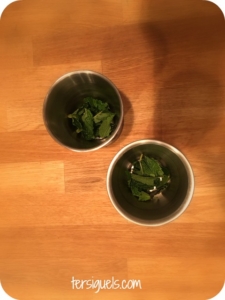
While I was dividing shrimp and ground beef, I asked Chef to split the wings.  He’s speedy, and I haven’t quite mastered playing with raw food and taking pictures.  I asked him to divide them up for me according to part.  Like this:

chicken-wings-divided-tersiguels
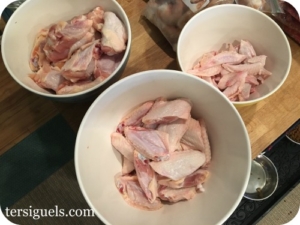
The smallest bowl has the wing tips, they are going to the back of the freezer to make chicken stock in the fall.  The others, I bagged six of each into four bags, twelve pieces total in each bag.  One bag landed in the fridge for buffalo wings on Thursday night.

Onto the bacon.  Again, dividing the five pound package down to one pound packages.  I wrapped these in freezer paper.  If you don’t have it, zip top it, and call it a day.  Lots of BLTs, and the easiest way to cook bacon, coming your way.

bacon-on-scale-tersiguels
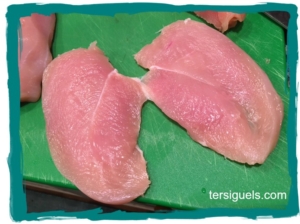
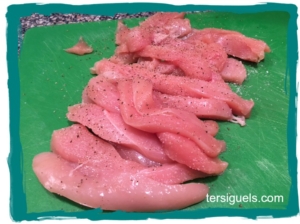
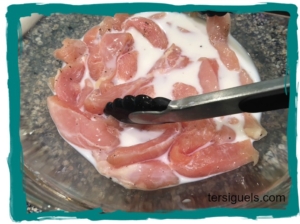
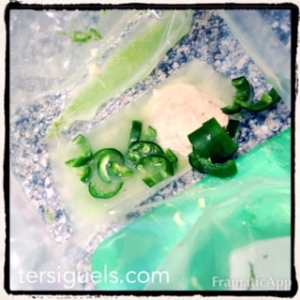
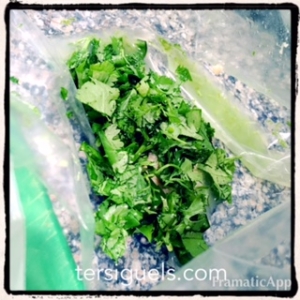
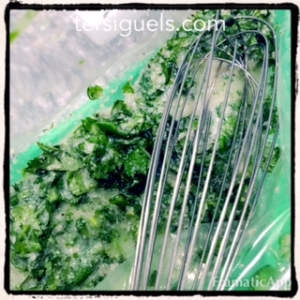
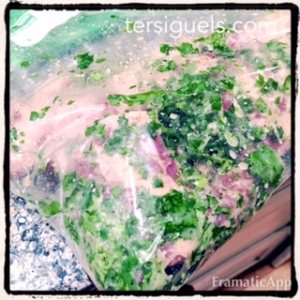
Last, but not least, the chicken breasts.  I made two quick marinades, soy and balsamic.  I prepared two bags of soy, one balsamic, and the last two bags, I left plain.  Sometimes, I just want a chicken sandwich, or chicken salad, or use a salsa to prepare it, so this gives me some more options.

chicken-ready-to-go-tersiguels
If you are keeping track, you may be wondering what happened to the pork shoulder.  I had the butcher cut it in half and when I got home, one half went into the freezer, and the other went straight into the crockpot for pulled pork.  This will lead to pulled pork, pulled pork MD style, maybe Carolina style and Asian.

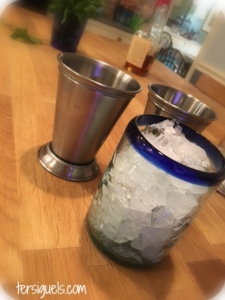
When all was said and done, this is what I had to put in the freezer:
haul-wrapped-tersiguels
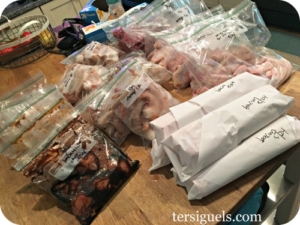
It was definitely a successful afternoon.  I will update this post, as I prepare a mix of recipes.  Knowing the freezer is full of protein for the summer, makes packing up the cooler for the pool, the park, Lurman Woodland, the drive in, and anything else that may come our way easier.

In my summer cooking planning, I have three rules I try to stick to.  First, if you can, grill it.  There is nothing worse than running the oven in the heat. Second, while the grill is on, in my case, or hot, in some of yours, grill for several days at a time. Third, I tend to cook dinner at breakfast, so when I am ready to pack the cooler, I am good to go.

Lastly, anything in italics will appear over the next few weeks on the blog.  Looking forward to summer meals with you.  And MN, go easy on us.

Baked Chicken Tenders

Here is a comical tale of food blogging.  LT eats nothing.  Literally.  He is on what many affectionally call the “white diet.”  White bread, white rice, French fries, pizza, spaghetti with pasta sauce (miraculously), cereal, yogurt, chips, goldfish, and chicken tenders.  Notice there are no fruits and vegetables on his I-will-eat-these-items-only list.  You can imagine what meal planning can be like.  As a general rule, we have spaghetti one night, and pizza one night.  The other five nights, unless we are out to eat, it’s cereal or PBJ for him.  If you ask him what his favorite thing to eat is he will say, “French fries and chicken.” (And by chicken, he means fried chicken tenders.)  I don’t make French fries and chicken.  One, that’s Chef’s job when we dine at Tersiguel’s, and two, I don’t enjoy frying at home.  It’s messy, and everything, I mean everything, smells like fryer oil, so I prefer to leave it to the pros.

I kinda got a bug the other day knowing I had chicken tenderloins in our freezer.  I thought what if I baked them?  I can’t say I was doing it to be healthier, I was just looking for alternatives to frying it.  And in my over active imagination, both L&L liked it, and asked when we could have again, and I blogged all about this great, time saving family recipe that everyone would like.  THE. JOKE. WAS. ON. ME. FRIENDS.  The good news, they really were good.  Even Chef said so, so I gotta go with this because maybe your little ones are on the white diet, or maybe your favorite food is chicken tenders and French fries, and this is an easy preparation.  Whatever it maybe, I am sharing this.

I am just going to say it up front – this whole recipe, the process of making it, the photos, and my kids lack luster reaction, made for a comical afternoon for me.

Up first, I grabbed four shallow soup bowls for dredging the chicken.  It started out like this:

tender-start-tersiguels
I am holding the camera, getting a quick shot of the set-up, and I am thinking, “Huh. Who is really gonna try a recipe that is already taking up this about of space?”  (I was already feeling defeated, and yet no dinner had been prepared.)

I grabbed a glass bowl and the package of chicken, and it was when I opened it, I realized I did not have chicken tenderloins, I had chicken breasts in the freezer.  I will say this, I could have easily just breaded them and thru them in the oven, but this was for the kids.  (Laugh it up, because I was and am.)  I put the glass bowl back, and grabbed a cutting board instead.  I started by butterflying the chicken breasts.

butterfly-chicken-tersiguels
The easiest way to do this is to press firmly on the breast with your non-cutting hand, and gently guide the knife back and forth thru the breast until it’s in two.  I left this piece together at the end, so you can see why it’s called butterflying.  I cut each halved breast into three to four pieces.

chicken-tenders-raw-tersiguels

This is three chicken breasts – a lot more yield than I was expecting, but I was thinking, “Great.  L&L will love it and I can test leftovers, too.”  (Keeping laughing.)  I liberally salted and peppered the tenders right on the board.  Then I grabbed the glass bowl.  In went the chicken, in went the milk.

chicken-in-milk-tersiguels

Ideally I would have preferred buttermilk, but I didn’t have any, and at the rate in which this recipe was being created and executed, I said forget it.  Regular milk is a-ok.  I am not sure if I have written this yet, but if I have, it must be important for me to keep saying, and if I haven’t, well, there is a first for everything.  These recipes that I share, I can only hope that they inspire you to try something new, or simply gather ideas for your kitchen.  I don’t see recipes as being rigid, I see them as I guide.  So, if you have zero reason to buy buttermilk other than this recipe, don’t do it.  Milk is just fine.  Or almond milk, coconut milk, soy milk.  I won’t be showing up to ask how you did it.  Enough about that, we have some chicken to dredge.

After the chicken sat in the milk for a few minutes, I looked at the amount of chicken I had vs the original bowl of flour I set up and knew that wasn’t going to work.  I turned to my trusty zip top bag to get the job done.  In a gallon bag, I added the drained chicken, and flour.  Sealed it.  Shook it like it was my day job.  The idea is to coat all the chicken in flour.  Pretty easy.  I felt like I was going in the right direction.

I set the chicken aside for a minute.  Before diving into the messy dip in egg, dip in panko, I wanted to make sure I didn’t have to do anything once I got started.  I was stopping for no man or little boy needing help with homework.

I prepared my baking sheet, by lining it with tin foil, and topping it with a baker’s cooling rack. Then I sprayed the rack with non-stick spray.  (This is also the easiest, least messy way to cook bacon.  MMMmmm, bacon.)  For clean up, I put the rack in the dishwasher, and throw the foil in the trash.  It’s a tough job, but someone has to do it.

tin-foil-pan-with-bakers-rack-tersiguels
I also took the time to season my panko bread crumbs.  Again, for the kids.  I kept the flavor simple.  Some salt, pepper, paprika, and Italian seasoning.

seasoned-panko-tersiguels
Here is the thing.  The next step, I have no pictures because, as previously stated, I was stopping for no man.

The process: In one bowl three eggs cracked, and quickly whipped, and salt and pepper added.  A handful of chicken from the flour bag goes into the eggs, coat each piece, and add to the panko, coat again.  And you keep this process up until you realize even if they do like it we are gonna be eating chicken for days, and you have finally coated all the pieces.

chicken-tenders-pre-cooked-tersiguels

Throw them in the oven.  Set the timer for twenty minutes.  Wash hands. Check first grade homework.  Or pour a glass of wine.  I should have poured the wine.  Oh well.

I had this thought once I got the chicken in the oven that they may not like it.  At this point, I really didn’t care because I knew I was eating it.  I thought what could I make on-the-fly that would warrant little prep, and no whining.  Oh, right, risotto.  I can only hope the mascara wearing readers have a tissue nearby because the tears from all the laughing you have done to this point have just burst thru the dam.  The risotto will have to wait until tomorrow for a post, but there is nothing on-the-fly about it, and as soon as the timer went off, I couldn’t wait to show L&L.

This is how it went down.

Me, “Boys I made chicken tenders, and special rice (aka risotto).”
LT, “I don’t want chicken or special rice.  I want the Finding Dory mac and cheese.”  
L2, “Me too.”

Now, you can weep with me.

chicken-tenders-cooked-tersiguels

I can’t even say these are kid tested, but they are definitely mother approved.  And I will be making them again, soon.

chicken-tenders-final-tersiguels

Baked Chicken Tenders
1.5 lbs chicken tenderloins, or chicken breasts cut into strips
1 c milk
1 c flour
3 eggs, whipped
2 c panko bread crumbs
1 – 2 tsp paprika
1 T Italian seasoning
salt
pepper

Preheat oven to 425 degrees.  Line a baking sheet with tin foil, top with a baker’s cooking rack, and spray with nonstick spray.

In a large bowl, add the chicken, and milk, salt and pepper.  Let stand for a three minutes.  In a zip top gallon sized bag, add the flour and drained chicken.  Close the bag, and shake to coat the chicken.

In a shallow dish, crack and whip three eggs, add salt and pepper.  In a second shallow dish, add the panko, paprika, Italian seasoning, and salt and pepper.

Dredge the flour coated chicken in the egg, and then the panko.  Continue this process until all the pieces are coated.

Put the baking sheet of chicken in oven, and turn the heat back to 400 degrees.  Bake for twenty minutes.

Mint Julep

Alright, here is a little something you may not know about me.  I like sports. It’s not anything spectacular because lots of people like sports.  I am an avid Ravens fan.  I enjoy watching the Wizards, Terps, Capitals (C-A-P-S! Caps! Caps! Caps!) I’m not much of a baseball fan, but the beer is always better at the stadium, and seeing L&L have a love for the O’s makes me want to watch.  I am a hometown girl, what can I say.

I love the Olympics.  (And they are coming, so we will discuss again.) I was pregnant with L2 when Isner and Mahut played the longest match in tennis history.  My in-laws are from France, and it’s always fun seeing how excited they become when their home town is on the Tour.  The World Cup is a two year build up in our house.  When the US women won, I wanted to shout from the rooftops.  All this back story about myself and sports does have a point.  Triple Crown, baby.

While I am sharing about me, I will fully admit, I know jack about jack when it comes to horse racing, but I know how awesomely exciting watching the Triple Crown races really is.  And friends, last year was the first time in my lifetime there was a Triple Crown Winner.   It’s true what they say, it’s the most exciting two minutes in sports.

It’s not just the excitement.  I really love the traditions that the Kentucky Derby, specifically, has maintained.  The Derby has been running at Churchill Downs since 1875.  The race, the hats, the roses, the mint juleps.

I won’t be traveling to Kentucky anytime soon, but you can bet your bottom dollar Saturday evening, I will be enjoying a mint julep and watching Bob Costas on NBC.  I am hoping you will be too.

There are several different methods for mixing this long standing cocktail.  It comes down to this.  You need bourbon, mint, sugar, crushed ice.  If you have julep cups, it’s all the more fun.  (You can pick these up at Pier1.)

mint-julep-final-tersiguels
Mint is a bit of an oxymoron in itself.  If you grow your own, it’s abundant.  You really can do anything to it, and it will grow.  It’s also self propagating, so if you plant in the ground, the next season it will come back everywhere.  The flip side, the leaves bruise easily once picked, so you want to handle it as little as possible.  Mint doesn’t need to be chopped.  Clean it with water and tear the leaves.

julep-cups-with-mint-tersiguels
Each cup has 6-8 leaves torn in half.  I then added simple syrup.  And filled the glass to the rim with crushed ice.

ice-ice-baby-tersiguels
Once the glasses are full of ice, I poured the bourbon right over it.

two--mint-juleps-tersiguels
Garnish with a sprig of mint.  ENJOY!

I can just imagine walking around Churchill Downs, keeping cool by sipping on Mint Juleps.

mint-julep-tersiguels

Mint Julep
2 oz bourbon
6-8 mint leaves, torn in half, plus more for garnish
1 T simple syrup
crushed ice
julep cup or rocks glass or pint glass if you are thirsty or solo cup

Put the mint leaves in the bottom of the cup.  Pour the simple syrup over the mint leaves.  Fill the cup with crushed ice.  Pour the bourbon over the ice.  Garnish with mint.

Simple Syrup
Combine equal parts sugar and water and bring to a boil.  Once the sugar is dissolved, remove from the heat and let cool.  Store in an airtight container for up to six months.

Jalapeno Lime Steak Marinade

I feel I put a hex on us with my Oprah sized excitement over the arrival of spring.  And while spring is in full swing, so too are the raw April showers, and so I haven’t grilled in the last few days, but wanted to share this spicy guy in case you are looking for a Cinco de Mayo recipe.

Friends – I give you the handiest tool in marinade making.  The zip-top bag.

empty-ziplock-tersiguels
This will act as your mixing bowl, marinade container, and keep you from cross contaminating in the kitchen, and at the grill.

To start out, I add the zest of one lime, the juice of two limes, a heaping tablespoon of crushed garlic, and two jalapeños cut into half moons.

lime-jalapeno-tersiguels

Then I thru in a bunch of finely chopped cilantro, salt, pepper and avocado oil.

lj-with-cilantro-tersiguels

And your mixing bowl…

lime-jalapeno-steak-marinade-tersiguels
Once mixed, add the steak.  In this case, I used skirt steak.

lj-steak-marinating-tersiguels
Throw this guy in the fridge for an hour or two, or overnight if you like.  There is a lot of flavor in here, so if you forget to marinade ahead or you have no idea what you are planning for dinner, this is a quick and easy marinade.

Head to the grill, and fire it up.  While the grill is heating up, pull the steak from the fridge to bring the temperature up.

I prefer my steak on the rare to medium-rare side, so I grill about 5 minutes per side.

lj-steak-grill-tersiguels
Once the steak is done to the desired temperature, and your mouth is watering, you just have to practice a few more minutes of patience.  You have heard it before, you are gonna hear it again.  You have to let proteins rest before you slice into them.  All the juice and flavor will run out on the cutting board, and you will be sadly disappointed.  So remember, just a few minutes.

lime-jalapeno-steak-tersiguels

And ready to eat.

lj-steak-salad-tersiguels

You can find the corn salsa here.

Jalapeno Lime Marinade
2 limes
2 jalapeños, pulp and seeds removed, cut into half moons
1 T crushed garlic, store bought is a-ok, or 5 garlic cloves rough chopped
1 bunch cilantro, cleaned and chopped (1/2 cup)
1 T avocado oil
salt
pepper
2 lbs skirt steak

In a gallon zip-top back, combine the zest of one lime, the juice of two lime, two jalapeños, garlic, cilantro, salt, pepper and oil.  Using a whisk, mix.  Add the steak.  Zip the top and gently move the streak around until covered.  Put in the fridge for one to two hours or overnight.

When ready, heat the grill.  For rare to medium-rare sear for five minutes on each side.

Slice thinly for salads or steak tacos.

Reduce, Reuse, Recycle

Up until about a month ago, we had a pretty hefty issue with water in our backyard.  And by hefty, I mean our yard was a swamp.  And by swamp, I mean L&L couldn’t play in our backyard without rain boots on ever.  Thankfully, last month, we finally had a landscaper drop French drains, rework the downspouts and our yard has dried out.  As a result, we had some pretty bad shape rain boots laying around.  With Earth Day just this past Friday and the weather coming around I thought L&L and I could recycle these well loved, and now too small boots.

batman-boots-before-tersiguels
We went to Frank’s Nursery in Elkridge.  I mentioned to Chef I could have spent my whole day there, but we were just picking up flowers for this project.  I pointed out the wave petunia to L&L and told them to pick any two they wanted.

wave-petunias-tersiguels

We should pause for a second.  I am not a gardner.  I don’t have a green thumb.  I am more of pea green with some brown swirled in.  I have to admit, that’s real progress from my black thumb a few years ago, so I feel like I am going in the right direction.  Most importantly for me is that I enjoy being in the garden.  It brings me so much joy and relaxation working in the dirt, and seeing some of fruits of labor come to fruition.  Additionally, I want L&L to know the importance of gardening, and experience the joy it brings.  If you are a gardening doubter, you just need to get out there, and start small.  I am so far from an expert, but I just keep building my knowledge from year to the next.

Back to the task at hand.  I would like you to meet my favorite non-kitchen tool.  The power drill.  I fitted this guy with the largest drill bit I own.
dewalt-power-drill-tersiguels
I very carefully drilled two holes in the bottom of the boots.  If you don’t have a drill or don’t like using them, no problem.  Using a hammer and a nail, hammer several holes in the bottoms of each boot.

boots-with-holes-tersiguels
There is no secret as to how well loved these boots really were.  Next, I asked L&L to gather a bunch of rocks and pebbles from our backyard.  Oh, boy.  To say they really weren’t interested was an understatement, but they hung in there for a few minutes.

I filled the bottom of each boot.  Tilting them forward a bit to make sure there was plenty of stones in the toes to weigh them down.  I figured between the holes and the rocks there would be sufficient water drainage.

boots-with-rocks-tersiguels
Next up I added a scoop of potting soil.  Which I neglected to take a photo.  Then I added a petunia to each boot.  I like wave petunias because they cascade.  I am pretty excited to see these in full bloom.

For now LT’s boots.

batman-logo-boots-tersiguels
And L2’s boots.

batman-boots-tersiguels
And together.

batman-boots-final-tersiguels
I am not sure this is their final summer landing spot.  A new fence for our yard is coming, and I thought I could string them to the gates.  Will see.  For now, I am just enjoying all the memories these boots carry for a bit longer.

Kitchen Staple: Balsamic Reduction

Every once in while, the gods smile down on me and I stump Chef with a cooking question.  A few days ago, this is how it went down.

Me, “What is the difference between a syrup and a glaze?”
Chef, “Well, a glaze is a reduction.  I guess technically, a syrup is a reduction too.”
Me, “Hmmm.”

I thought, to myself, “Self, why don’t you google it?”

Is it not amazing the information we have at our finger tips?  How many dinner conversations have changed because of life long unanswered questions?  A few years ago, while on a family vacation, the topic of the Chesapeake Bay Bridge came up.  And the questions were rapid fire.  What year was it built? How did you drive to the beach before it was built?  How long did it take to build?  When did they add the second bridge?  Wow, about that ferry service we never knew about.  Each of us learned that day about the architecture of the bridge, how the DOT purchased the ferry company so that it would continue to make a profit while the bridge was built.  Pretty amazing stuff, just at our finger tips.  And for us Marylanders, a necessary way of life and relaxation revolves around this very special set of bridges.

I digress, but I have a point.  At that dinner table in our Bethany Beach house rental, in just a matter of minutes, I had googled “when was the Chesapeake Bay Bridge built,” and the we had more answers than expected.

So, I googled “syrup vs glaze” and “the difference between syrup and a glaze.”  Nothing.  Nada. Zilch.  No help from the old google.  I went rogue.  I went old school.  I went to The Professional Chef* and Webster’s**.

resources-tersiguels

From The Professional Chef:

glaze: to give an item a shiny surface by brushing or otherwise coating it with sauce, aspic, icing, or another appareil.  For meat, to coat with sauce and then brown in an oven or salamander.

reduction: The product that results when a liquid is reduced.

syrup:  Sugar that is dissolved in liquid, usually water, possibly with the addition of flavorings such as spices or citrus        zests.

Thanks to the definition of reduction, I had to turn to Webster’s to double check two things. 1) The definition of definition, just make sure that elementary school grammar was as accurate as I remember.  2) To see how Webster defined reduction.

From Webster’s:

defi·ni·tion (def’ə nish’ən) n. 1 a defining or being defined

LET’S JUST HOLD THE PHONE!  It goes on, but what’s the point?

In good old elementary school, did not the best teacher of all time, Miss Hauck teach us that you do not, you cannot include in the definition of the word the word itself.  Well, thanks a lot Webster.  For nothing.

Alright, the English lesson is over.  I couldn’t even bring myself to look up reduction in Webster’s for fear that it would have the word in the definition.  And I don’t want to have to admit how many times I had to google MLA format.

The point of all of this is this, in cooking the vocabulary is extensive.  And looking up these words taught me some clearly valuable lessons.  If there was A Chef’s Wife glossary of terms this is what it would say.

A glaze – The mixing of powder sugar and milk to dip home made donuts.

A reduction – Made from balsamic vinegar and used regularly in my cooking.

A syrup – Combining a one-to-one ratio of water and sugar that is brought to a boil.  While cooling herbs like rosemary are added.  Once cooled, combine with fresh squeezed orange juice and bourbon.

I am finally coming full circle.  I realized a few weeks back there are several recipes I have wanted to share, but I realized I hadn’t shared this kitchen staple.

Your players…

balsamic-reduction-players-tersiguels

When you open the vinegar, you may have a plastic cap.  For your own sanity (assuming you aren’t beside yourself about the definition of definition) pop it off.  You can use this trusty kitchen tool.  Or dental tool, craft tool, carpentry tool.  Whatever you may call needle nose pliers in your house.

pliers-as-a-kitchen-tool-tersiguels

Once your cap is off, pour the entire bottle into the pot.  On medium high heat, bring the balsamic vinegar to a boil.  Reduce the heat to medium low.  Simmer for close to an hour.  Reducing the vinegar by half.

simmering-balsamic-tersiguels

Remove from the heat, and allow to cool.  Once cooled, you can return to the original bottle for storage.

balsamic-funnel-tersiguels
Just a few quick notes:
– Reducing is not making a syrup or caramel.  It’s important to turn the heat down because the sugars in the balsamic vinegar will in fact turn to caramel.
– Vinegar has a very strong fragrance.  Once you heat it, it’s like a household diffuser.  If you don’t like the smell, this is the time of the year to make this because the windows are open.  (Don’t lean directly over the pot, trust me.)
– The vinegar will become slight thicker once reduced.  That’s the consistency you want.  It should easily coat the back of a spoon.
– By reducing the vinegar you are intensifying it’s flavor.  By doing so, you have just made the world’s easiest dressing.

balsamic-sample-tersiguels
This is my go to dressing.  You don’t need to add oil or mix.  Drizzle a small amount on your salad.  Add salt and pepper.  Eat.

I am looking forward to sharing with you other ways I incorporate this reduction in my recipes.

*The Professional Chef. 8th ed. New York: Wiley, 2006. p 1179, 1184, 1188.

**Dictionaries, Webster’S New World College. Webster’s New World College Dictionary. Cleveland, OH: John Wiley, 2006. p 379.


Fire Roasted Corn Salsa

It’s official.  Yes, I am calling it.  SPRING HAS FINALLY ARRIVED!  (And I double checked with Justin Berk, and it seems that is his assessment too.)

The last three days have been glorious, and if you hadn’t fired up your grill yet this year, I am betting many people finally did.  I came to the conclusion that we are going to need a new grill.  Aaahhh, grill season.

Generally, when I grill, I try to have the grill do all the cooking or prep for several meals for the week in one batch.  This is great in the summer months when I know we are going to be at the pool multiple weeknights.  Even though pool season isn’t here yet, the grill did triple duty today.  First up, fire roasting corn.

Maryland corn has barely been planted, so I scooped up the pre-packed, post-husked corn at Costco.  It was entirely out of convenience.  I prefer to buy local corn with the husk on.  It’s a bit nostalgic husking corn out back, but even more, you can throw it right on the grill.  No boiling pot of water.  Today, it didn’t matter so much because the corn had to be husked and was going directly on the grill.

I started out with six ears, and sprayed them with olive oil non-stick spray.  (Use what you have.)  Chef and I have a gas grill, also for my convenience, and shoulder muscles. (There is a story here about my parents Green Egg, and physical therapy, but I can tell you all about that another time.)  Moving on.  Place the ears on a high heat grill.  Turn every three to five minutes until each side is roasted.

corn-before-grill-tersiguels

While the corn is grilling, back in the kitchen, I prepped the rest of the veggies.  I started with cilantro.  I prefer to get the herbs outta the way first.  They make a mess, and I really can’t stand the process of picking the herbs, so first for me is better.

cilantro-with-mezzaluna-tersiguels

A few years ago, my mom traveled to Alaska.  She brought back a mezzaluna for each of us.  Call your mom now, and ask here to go to Alaska to get you one too.  Just kidding.  Kinda.  I like using this for chopping herbs because I don’t have to pick them.  The stems fall to the bottom.  Here I have cilantro sprinkled with some salt and I just go to town rocking the mezzaluna back and forth.

The second messy task – getting the corn off the cob.  Can you guys tell I like making messy recipes?  Removing the corn is pretty simple.  Hold the corn up right and using a sawing motion with your knife, just go back and forth until the cob is clean.  If you press down with knife, you don’t get the whole kernel off the cob.

cutting-corn-from-cob-tersiguels
Taste the rainbow.  (It’s not just for Starbursts.)

taste-the-rainbow-tersiguels
Once everything is chopped, you just combine.  I wanted to add avacado too.  Not only is healthy, it has great flavor and texture.  I had planned to use this for a salad “dressing,” and avocado gives a creamy texture.  I wanted to show you the way I diced avocado because this is one of the least messy things I did in the kitchen today.  I cut the flesh while it’s still in the skin, and scoop out with a spoon.  If the avocado is ripe, you won’t have any problem cutting or scooping.

diced-avacado-trick-tersiguels
Here is everything before the mix. I mean, I wish I could have had you all for dinner tonight.

corn-salsa-pre-mix-tersiguels
Mixed and ready to go.  I add lime zest, a squeeze of lime juice and salt to finish it off.
corn-salsa-mixed-tersiguels
I made fire roasted corn salsa salads for dinner. So simple.

corn-salsa-and-steak-tersiguels

The recipe makes a large batch.  I could have easily made two more entree size salads.  Later in the week, I will enjoy it as a quick snack on a bed of greens or rolled up with the leftover steak for dinner. Or on pretzels or tortilla chips.  Or inside a quesadilla.  The options are endless.

Fire Roasted Corn Salsa
6 ears of corn, husks removed
1/2 bunch cilantro, rough chopped
1 red bell pepper, small diced
1 jalapeno pepper*, finely chopped
1/2 red onion, small diced
1/2 pint mixed cherry or grape tomatoes, sliced in half
1 lime, zest and juice
1 avocado
salt

Preheat grill.  Spray each ear of corn with cooking spray to prevent it from sticking to the grill.  Rotate the ears every three to five minutes until all sides are charred and cooked thru.  (At most 15 minutes.)

While the corn is grilling, clean and chop the cilantro, peppers, onion, and tomato.  Once the corn is able to be touched, cut the corn from the cob.  Combine the corn with the peppers, onion, tomato, cilantro.  Add the avocado.  Zest the lime and squeeze one half of the lime into the bowl.  Sprinkle with salt and mix.  Serve immediately.  (This recipe can be made ahead and will keep for several days in an airtight container, it is best served at room temperature, so be sure to pull it from the fridge a half an hour ahead of serving time.)

*If you prefer a mild salsa, you can easily omit the jalapeno.  Like it more spicy, add more.


Spinach Stuffed Peppers

One of my favorite meals is Spinach Pie – similar to Spanakopita, but I prepare it like a quiche.  The problem is that Chef is not a super fan of quiche, and I haven’t mastered the art of quiche for one.  Needless to say, it’s one of my favorite flavor combinations, so a few years ago, I simplified the recipe to stuff into mini bell peppers.

These colors!

mini-mixed-peppers-tersiguels

To prepare the peppers, I simply cut the tops off, and using a pairing knife or grapefruit spoon, I cut the seeds out.

mini-peppers-cut-tersiguels
Let’s pause on the recipe for a moment.  I haven’t really taken much time to discuss kitchen must-haves.  And my list is long, and my must-haves definitely can fall into the you-really-don’t-need-this-but-its-too-cool-a-gadget-to-not-have, and in truth it’s why I haven’t said much.  In reality you need very few things to execute great recipes.  One of them is a pairing knife.  Yes, you can go into any store a buy one.  And yes, they range in price.  You can buy a cheap one and be happy, or an over the top expensive one and be happy.  Makes no difference, but you need to like the way it feels in your hand. Chef’s tip – it needs to be sharp, too.

Alright, back to the peppers.  Up next the filling.  I start with an egg, salt, pepper, dill, and a bit of half and half.  (You can sub milk, heavy cream, or whatever you use at home.)

egg-dill-stuffed-pepper-start-tersiguels
You want to beat just until it’s mixed, and then add the feta and cottage cheese. (I keep cottage cheese as a staple, but if want a richer recipe, you can substitute ricotta.)

cheese-mixture-stuffed-pepper-tersiguels
Once combined, I add the chopped spinach.  This recipe is easier to execute with frozen spinach.  I just quickly defrost what I need in the microwave and squeeze the excess moisture out with a paper towel.

secret-ingredient-tersiguels
One thing about this flavor profile, it can easily be changed.  A little nutmeg, red pepper flakes, chopped scallions, they all add a nice complexity.  A dear friend of mine shared this Cape Herb & Spice with me.  I think it’s easy for people to make assumptions about sriracha as being “hipster,” but in reality, it is a great addition to many recipes, giving food another layer or dimension.  I added a dash as a little goes a looong way. This forewarning reminds me of a funny story.

When I was in college, I worked for a local Maryland farm at their Farmer’s Market stands in Baltimore and Dupont Circle.  A luxury of working for them was that I could purchase some treats for a minimum fee or sometimes was given veggies for free.  On a specific Saturday, I brought home some habaneros.  This is what happened…

Me, to three of my brothers as I am running out of the kitchen, “I left some produce on the counter.  Don’t touch the peppers. They are habaneros.”  
What they heard, “Hey, see those peppers, touch them, and take a big bite out of them.  They are really good.”  And they dared each other to bite into them.  Who in their right mind?!?!?!?!  There were tears of agony and hilarity at the whole situation.  

Every day, these four men bring me so much joy and torment.  L&L are following right in their footsteps.

Onto the messy assembly of stuffing the peppers.  I use a teaspoon for filling the peppers.  If they are very narrow, I use the handle of the spoon as a spatula to make filling them easier.

filling-the-pepper-tersiguels
As if the act of filling them isn’t messy, now they need to stand up in a baking dish.  Grab your tin foil.  I make a loose ball, that holds the peppers up and I can slowly tighten it to fit the space.

tin-foil-trick-peppers-tersiguels
All stuffed and ready to go…

pre-bake-peppers-tersiguels
Bake at 400 degree oven for 25 – 35 minutes and serve.  These peppers make great leftovers for snacks for several days after.

stuffed-mini-peppers-final-tersiguels

Spinach Stuffed Peppers
1.5 lb bag of mixed mini bell peppers, tops trimmed off and cleaned of seeds
1 egg
2-3 T half and half
1 t dill weed
salt, pepper
1 c feta cheese crumbles
1 c cottage cheese
8oz chopped spinach
optional: nutmeg, or scallions, finely chopped, or red pepper flakes, or Sriracha chili powder

Preheat oven to 400 degrees.

In a bowl, combine, egg, half and half, dill, salt and pepper, and optional seasonings.  Add feta and cottage cheese, mix until combined.  Add the spinach.

Grease a shallowing baking dish or soufflé dish.  Fill the peppers.  Using tin foil, if needed to help them stand.
Bake for 25-35 minutes.


Movie Night Popcorn Bar

I love movies.  In my life before little people, it was one of my favorite things to do, and I would go on a weekly basis. In truth, it still is, but I don’t go as often as I want (I think I am averaging an one adult movie a year for the last seven years).  As a result of my love for movies, L&L have the same love.  They are old enough to go to the theatre, sit, watch, and enjoy with no complaining or needing to run out often for bathroom breaks; the problem lies in the fact that there are long stretches of time where there isn’t an age appropriate/content appropriate movie in the theatre to go and see.

Enter HOME MOVIE NIGHT!  It’s sometimes even better than going to the movies because you can be in your pjs, snuggled with your favorite blanket, stuffed animal, and pillow, and the pause feature is easily in effect if needed.

In case you missed it, Star Wars: Episode VII The Force Awakens™ (L&L say the full title when discussing) was released digitally and on blu ray/dvd this week.  We did go to the theatre back in December to see it, and we have been discussing its release on blu ray ever since.  Like all good (insert 4/5/6) Star Wars™ movies, it needs to be watched many times over.  There is just so much to see.  My first priority after dropping to kids to school on Tuesday was getting Star Wars™.  And while we normally don’t have movie night in the middle of the week, this was a special occasion.

After homework, dinner and getting pjs on, it was time for Star Wars™ and snacks. What’s a movie night without movie theatre snacks?

It’s pretty simple.  I start with the classic, popcorn, and build from there.  I have an oil popper, and I use coconut oil.  You can use anything you’ve got.  Microwave, pre-popped store bought, air popped, whirly popped, stove popped.  You get the idea.  That’s one thing I really enjoy about movie night, the possibilities are endless.

movie-night-treats-sample-tersiguels
This is what I had on hand.  When Target has movie snacks on sale, I pick up a bunch and stash them deep in the pantry. L&L were upset that we didn’t have Swedish Fish®, but as I pointed out to them, they had eaten them all.

This is a make your own popcorn/movie snack bar.  I just dish up everything, so we aren’t reaching into boxes.  Everyone gets a bowl and napkin and can put what they want in their bowl.

popcorn-bar-tersiguels

My face book followers saw this Tuesday. You get the idea.

L2-movie-night-tersiguels
L2 getting ready forStar Wars: Episode VII The Force Awakens™.  I missed LT because I was changing the laundry.  The only downside of movie night at home.  A mother’s work is never done.

And here is mine.

popcorn-mix-bowl-tersiguels

The only thing that may have made it better would have been some UTZ® potato chips.

We all enjoyed the movie even more the second time because Michel was with us.  And that is a treat unto itself.

Movie Night Snack Bar
I have made a list of suggestions, but there is no limit.
Popcorn
Pretzels
Chips
Goldfish®/Cheez It®
Fruit chews, fruit snacks, dried fruit
Granola
Marshmallow
Nuts
Candy – all kinds, theatre style and your favorites

Place each item in its own dish.  Give each movie watcher their own dish to mix and match.  Enjoy!  Press play.

Just For The Halibut

(I am not going to lie, I just wanted to use that title.)

As I was preparing this dish the other evening for dinner, I was thinking about how much I enjoy eating fish, but I rarely plan to make it.  I came up with two and a half reasons.  One, oh, that’s right, my kids don’t eat it.  Two, generally, when I dine out, I order fish simply because I know I am not likely to prepare it at home.  And the half reason – the fear factor.  And today, I am going to put all of your fish preparing fears to rest!

Readers. Meet tin foil.  More commonly known as aluminum foil.  I do not know why I call it tin foil.  It is not tin.  It has not been commonly used since WWII and considering, I was a several decades away from birth, I really, truly have no idea why I call it that, but it’s been a 35 year habit in the making, so just be with me on this. (Just a little inside look at my brain.)

Reasons I love using tin foil “packets” for preparing fish…
1)It makes preparing fish easy.  See. No fear.
2) You can use any fish.
3) You want to grill it, broil it, bake it.  You can.
4) You can put any combo of flavors in them.
5) You can make one or ten or a hundred.
6) And the best part – the easiest clean up.  Unless, you have a personal dishwasher, in which case, you may not be as excited about this reason.

My go to for foil packets is citrus fruit.  Sliced lemons.  Aahhh, can you smell the freshness?  You need three to four slices for each packet.

lemon-slices-tersiguels

Next you need to tear of foil pieces large enough to hold your fish.  No real science here.  Half sheet pan size is a good estimate.

lemons-in-foil-tersiguels
Start with the lemons slices in the middle. This is your base.  Add your fish.

citrus-thyme-halibut-pre-cook-tersiguels
Add salt, pepper, and herbs if you like.  I threw in some thyme.  (Quick side note – I cannot wait for the herb garden to be planted and growing, but first we all will sit and wait for Mother Nature to come around to the idea that the rest of are ready for SPRING!)  Throw a little drizzle of your choice of oil on top.

foil-wrapped-fish-tersiguels
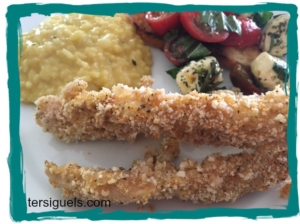
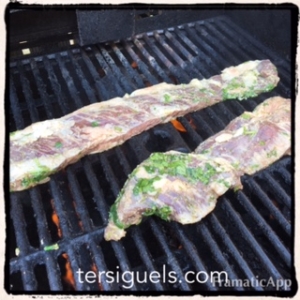
Wrap the fish.  Not too tight.  And throw it in the oven, or on the grill and dinner is almost ready.

citrus-halibut-final-tersiguels
Ahh.  Delicious halibut.  This is an easy-peasy-lemon-squeezy recipe. Literally.

Citrus Halibut Foil Packets
6 oz halibut filets (or any fish you have on hand or like)
sliced lemons, three to four for each packet
salt
pepper
herbs – thyme, tarragon, parsley, cilantro, rosemary
oil, a drizzle for each
tin foil, a section for each portion of fish

Preheat the oven to 425 degrees.  Or fire up the grill.

Line each foil section with lemons.  Top with halibut.  Season with salt and pepper.  Add an herbs and a drizzle of oil.  Fold the packets up loosely.  Place on a sheet pan for baking in the oven.  Bake for 15-18 minutes.  Let set for several minutes before opening the packets.  Serve in the foil if you like.